LogoLogo
Help
  • Overview
    • Introduction
    • Characteristics
    • Platforms
  • INITIAL Installation
    • 1. Instructions by platform
      • ProSBC Requirements Matrix
      • Baremetal Installation
        • List of Supported Network Interface Cards
        • SBC Certified Hardware
          • High Performance Baremetal Server
          • Medium Performance Baremetal Server
          • Ciena 3906mvi server for Customer Premises Equipment (CPE)
          • Qotom Barebone server for Customer Premises Equipment (CPE)
          • Lanner Barebone server for Customer Premises Equipment (CPE)
          • Telco Systems virtualization platform on Lanner NCA-2510 server for Customer Premises Equipment(CPE)
      • Virtual, self-hosted Installation
        • Virtual - Proxmox
        • Virtual - VMware
          • Launching an Instance of VMware vSphere
          • Deploying ProSBC on VMware
          • Adding Network Interfaces in VMware
          • Configuring Passtrough interfaces on VMware
      • Cloud Installation
        • Cloud - AWS
          • AWS Installation
          • Cloud Formation Installation
          • Instance Upgrade
          • AWS Additional Interface
          • AWS Installation Troubleshooting
          • Recovering an Elastic IP address
        • Cloud - Azure
    • 2. Initial Configuration
      • Initial Setup
        • SBC Management IP configuration
      • Basic configuration
        • Configuring IP interfaces
        • Creating a SIP stack
        • Creating a SIP transport server
        • Allocating an SIP NAP
        • Allocating a SIP open NAP
        • SIP Transport DNS settings
        • Creating a first call route
    • 3. Uploading a License
      • Host-control
        • SELinux
        • SELinux management
      • Add/Change Licenses
        • Add/Change Licenses Manually
  • Use Cases
    • Applications
      • Carrier Interconnection
      • Monitoring as a Service (MaaS)
      • NGN Interconnection
      • Operator Interconnection
      • SIP subscribe notify publish forwarding
      • STIR/SHAKEN
      • Transcoding
      • SIP Trunking
      • Hosted PBX
      • SIP Network Peering
      • Remote Workers
    • Interoperability Examples
      • STIR/SHAKEN with Transnexus and ClearIP
      • Fraud Detection [YouMail]
      • Skype Connect
      • Skype for Business S4B TCP
      • Skype for Business S4B TLS
      • Asterisk
      • 3CX
      • FreePBX
      • FusionPBX
      • FreeSWITCH
      • Twilio
      • Sippy
      • Avaya IP Office
      • Cisco UCM 12
      • Brekeke PBX
      • VitalPBX
      • Yeastar P-Series Cloud
      • VoIP.ms
      • Wildix
  • CONFIGURATION DETAILS
    • Configuration By Web Portal Category
      • System Settings
        • Setting the Role to Standalone
        • Setting the Role to a Primary Unit in a 1+1 System
        • Setting the Role to a Secondary Unit in a 1+1 System
        • Resetting the Host Role
        • Resetting the Network Device Role
        • Create Session Border Gateway Access Control List (ACL)
        • Session Border Gateway: Advanced Parameter Settngs
        • Create Session Border Gateway Access Control List (ACL) Filters
        • Connecting to the Web Server and Logging on to the Web Portal
        • Logging Off
        • Modifying Security Settings
        • Creating Web User groups
        • Creating Web Users
        • Modifying Web User Permissions
        • Enabling and Disabling a User
        • Deleting a User
        • Accessing Audit Logs
        • Activating the Configuration
        • Configuring a Web Portal Profile
        • Configuring the Date, Time, Timezone and NTP servers
        • Configuring the DNS
        • Create HTTP Service
        • Use HTTPS service
        • Configure HTTPS certificates
        • Configuring letsencrypt certificate
        • Configuring the ICMP
        • Configuring the SSH
        • Upgrade Telcobridges linux software packages
        • Retrieving a Software Release
        • Uploading a Software Release
        • Activating a Software Release
        • Retrieving a License
        • Uploading a License
        • Database Backup
        • Downloading a Database Backup
        • Uploading a Database Backup
        • Restoring a Database
        • Enabling the SNMP Agent
        • Configuring the SNMP Agent
        • Creating an SNMPv1/SNMPv2 Community
        • Creating an SNMPv3 User
        • Creating an SNMP Trap Destination
      • IP Network Settings
        • Configuring a Virtual Port
        • Configuring a VLAN
        • Configuring an IP Port Range
        • Configuring IP Interfaces
        • Configuring NAT Traversal
          • Local NAT Traversal
          • Remote NAT Traversal
        • DNS Configuration
          • Creating a DNS Local Entry
        • Configuring VoIP Interfaces
      • SIP
        • Creating a SIP Stack
        • Creating a SIP Transport Server
        • TLS/SRTP
          • Creating TLS Certificates
          • Adding TLS Certificates
          • Configuring TLS Profiles
        • Enabling SIP-I/SIP-T
        • SIPREC Forwarding
      • SIP Registrar
        • Creating a SIP Domain
        • Creating a SIP Registrar
        • Creating a SIP Register Filtering Rule
        • Creating a SIP Register Filtering Rule Condition
        • Creating a SIP Register Filtering Rule Action
      • Network Access Points (NAP)
        • Allocating a SIP Open Network Access Point (NAP)
        • SIP NAP Polling
      • NAP Profiles
        • Profile SDP Description
        • Fax Settings
          • Configuring Fax Relay
          • Configure Fax Passthrough
          • Configure Fax T38
          • Configure Fax NSE
          • Configure Fax VBD
      • Call Routing
        • Creating a First Call Route
        • Enable Flexible NOA Routing Script
        • Add NOA Columns in Routes
        • Import Customized Routing Script
        • Add Customer Column in Routes
        • Add Customized Filter Script To Main Script
        • Adding Label Routing to a Routing Script
        • Assign Routing Script Database Files to the Gateway Application
        • Add Digitmap Files to the System
        • Add Routeset Definition Files to the System
        • Assign Definition Digitmap Files on a per NAP Basis
        • Generate Dynamic Routes
        • Steps to configure label routing for Group of DIDs to a single outbound NAPs
        • Steps to configure label routing for Group of DIDs to multiple outbound NAPs
        • Group of DIDs to multiple outbound NAPs: Load-sharing mode
        • Group of DIDs to multiple outbound NAPs: Priority Mode
        • Update the Digitmap Files
        • Update the Routeset Definition Files
        • Configuring RADIUS Authorization
        • Importing a RADIUS Custom Dictionary
      • Lawful Intercept
        • Lawful Intercept Status
        • Verifying lawful interception
        • Importing a Lawful Interception .CSV File
        • Enabling Lawful Interception in a Routing Script
        • Configuring Lawful Interception
      • Call Detail Records (CDR)
        • CDR Variables
          • Call statistics format
        • Retrieve Text CDRs
          • Automatic CDR Retrieval
        • RADIUS CDRs
          • Configuring RADIUS
          • Adding RADIUS Server(s)
          • RADIUS CDR attributes
      • Routing Scripts
        • Development Guides & Tutorials
          • Accessing Routing Script Parameters
          • Parameter Mapping
          • Script Parameters Definition
          • Script Parameters Definition for SIP
          • Accessing Information about Registered Users
          • Route Parameters and Call Routing
          • Playing prompts, announcements, and tones
          • Recording
          • User-to-User Information
          • Radius Authorization
          • ENUM Query
          • DNS Query
          • Call Diversion Options
          • Call Transfer Requests
          • Redirection
          • Connect Number
          • Terminating Calls
          • NAP Status and other NAP Information
          • Telephony Services (CNAM Requests over SS7)
          • Custom User Context
          • Routing Script Tests
          • Create New Routing Script
          • Enable Routing Script
    • Configuration By Use Case
      • SIP Trunking Configuration
        • Configuration Files for SIP Trunking Scenario
        • SIP Trunk Configuration Instruction with 3CX
        • SIP Trunk Configuration Instruction with FreePBX
        • SIP Trunk Configuration Instruction with FusionPBX
        • SIP Trunk Configuration Instruction with FreeSWITCH
        • SIP Trunk Configuration Instruction with Twilio Elastic trunking
        • SIP Trunk Configuration Instruction with Avaya IP Office
        • SIP Trunk Configuration Instruction with Brekeke PBX
        • SIP Trunk Configuration Instruction with Avaya IP Office
        • SIP Trunk Configuration Instruction with Yeastar P-Series Cloud
        • SIP Trunk Configuration Instruction with Cisco UCM
        • SIP Trunk Configuration Instruction with VoIP.ms SIP trunking
        • SIP Trunk Configuration Instruction with Wildix Cloud VoIP PBX
        • Configuration for Adding ProSBC as a SIP Trunk in the FreePBX Server
        • FreePBX Extension Creation
        • FusionPBX SIP Trunk Creation
        • FusionPBX Extension Creation
        • FreeSWITCH SIP Trunk Creation
        • Twilio Elastic SIP Trunking Configuration
        • Sippy SIP Trunk Creation
        • Avaya IP Office Trunk Creation
        • Cisco UCM 12 Trunk Creation
        • Adding ProSBC as a SIP Trunk in the Brekeke PBX
        • VitalPBX Extension Creation
        • Adding ProSBC as a SIP Trunk in the Yeastar P-Series Cloud
        • Adding ProSBC as a SIP Trunk in the Wildix Cloud VoIP PBX
        • SIP Trunk Configuration Instruction with VitalPBX
        • VitalPBX SIP Trunk Creation
      • Configuring SIP Registration to SIP Proxy
      • Configuring a Hosted PBX
      • Multiple Domains/Hosted PBXs
      • SIP Network Peering / IP Carrier Interconnection
      • Remote Workers
        • Configuration Files for Remote Office/Workers
        • Remote Workers Configuration Instruction with FusionPBX
        • Remote Workers Configuration Instruction with 3CX
        • Remote Workers Configuration Instruction with FreePBX
        • Remote Workers Configuration Instruction with VitalPBX
      • ProSBC and ClearIP (TransNexus)
        • Configuration for STIR/SHAKEN with Transnexus' ClearIP service
        • Configuration for CNAM Verification and Robocall Analytics with Transnexus' ClearIP service
        • Configuration for Robocall Mitigation with Transnexus' ClearIP service
        • Configuration for 302 Redirect routing with Transnexus' ClearIP service
        • Configuration for CAPTCHA Authentication – 302 Redirect with Transnexus' ClearIP service
        • Configuration for STIR/SHAKEN with Transnexus' ClearIP service
      • Transcoding Unit Configuration
        • Baremetal and Virtual Machine
        • Show the Hardware Units menu
        • Adding Transcoding Unit
      • Configuration for Adding YouMail Script to Routing Scripts
      • Skype Connect Example Configuration
      • Skype for Business Example Configuration
      • 3CX Phone Provisioning Configuration
        • Configuration for 3CX PBX Server with the ProSBC to receive T38 Faxes
        • Configuration for 3CX PBX Server with the ProSBC as SIP trunk
      • SIP Emergency
      • SIP registration forwarding
        • Creating a SIP Domain
        • Configuring SIP Registration for Open NAP
        • Configuring SIP Registration for regular NAP
      • RTP no-anchoring
        • Parameter: Allow low-delay media relay
          • Configuring an IP Port Range
        • Creating Profiles
          • Modifying SDP Profile Settings
          • Modifying SIP Profile Settings
          • Modifying RTP and Audio Settings
          • Modifying FAX Relay Profile Settings
          • Modifying Telephony Profile Settings
          • Modifying Tones and Call Progress Options
          • Modifying IVR Record Profile Settings
          • Modifying LNP Profile Settings
          • Modifying Multilevel Precedence and Preemption (MLPP) Options
          • Modifying Call Transfer Profile Settings
          • Modifying Tone Definition Profile Settings
    • Configuration Parameters (all)
    • Routing Script - SIP 302 Handling
  • Maintenance & Troubleshooting
    • Maintenance Guide
      • Check Disk Space
      • ProSBC Processor Usage
      • Troubleshooting Toolpack
      • Restoring a Database
    • System Upgrades
      • Migrate current database
      • Upgrade Telcobridges linux software packages
    • Software version release notes
    • Software version release download
    • ProSBC public roadmap
  • Troubleshooting & Support
    • Troubleshooting Tips & Actions
      • Configuring Call Trace
        • Retrieving Call Trace
        • Call Trace Filter Parameters
      • Creating a test call
      • tbsigtrace: Signaling trace capture tool
        • Accessing Device
          • TMG:Change Management IP Address
          • Password less ssh
          • How to setup ssh tunnel with PuTTY
        • Live Signaling Capture with tbsigtrace
      • How to Get Rid of Sub Optimal Warning
      • How to Lower The Trace Level on an Application
      • TBReport
      • VoIP Ethernet Capture on a ProSBC
      • Enabling Call Recording
      • Accessing the Call Recording
      • Routing Scripts
        • Update Your Routing Scripts
        • Disabling a Call Route
    • Troubleshooting Common Problems
    • Support Links
      • Support Forums
      • ProSBC Training
      • Customer Dashboard User Guide
      • Contacting TelcoBridges technical support
      • Frequently Asked Questions
      • Sending Large Files to TelcoBridges
    • How to use tbx cli tools remote program
  • Tools, Tips, and Tricks
    • TelcoBridges Magic Bookmark
    • Video Library
    • RESTful API
      • Postman Examples
      • Ruby Examples
      • TBConfig Examples
        • Exporting a Configuration
        • Importing a Configuration
        • Activating a Configuration
        • Updating a Route
        • Dropping Calls
      • ProSBC:Restful API SIP Domain
      • ProSBC:Restful API SIP Domain Registrar
      • Extracting Call Traces with the API
    • TBStatus API
      • Tbstatus monitoring
      • Status API
      • Dropping calls
  • Appendices
    • Appendix A: Glossary
      • Glossary: Call Detail Records (CDR)
      • Glossary: Call routing
      • Glossary: DNS
      • Glossary: Mean Opinion Score (MOS)
      • Glossary: NAP
      • Glossary: RADIUS
      • Glossary: Ringback tones
      • Glossary: SAP
      • Glossary: Signaling protocols
      • Glossary: SIP
        • Glossary: Route retry
        • Glossary: SIGTRAN
        • Glossary: SIP-I/SIP-T
        • Glossary: SIP gateway
        • Glossary: SIP Registration
      • Glossary: Softswitch
      • Glossary: Toolpack
        • Glossary: Web server
        • Glossary: tboamapp
          • Glossary: Tbtoolpack Service
            • System Id
              • Gateway Port
          • Primary/Secondary
          • Master/Slave
            • Active/Standby
      • Glossary: Unified communications
      • Glossary: Web Portal
      • Glossary: DTMF Relay
    • Appendix B: Product Datasheets
Powered by GitBook
On this page

Was this helpful?

  1. Troubleshooting & Support
  2. Support Links

Customer Dashboard User Guide

PreviousProSBC TrainingNextContacting TelcoBridges technical support

Last updated 4 months ago

Was this helpful?

The Telcobridges Customer Dashboard enables you to order new licenses for one or more of your products as well as upgrade existing licenses. From this one Customer Dashboard you can view all of your product licenses and manage them from one place. To learn more about the Customer Dashboard, select from the topics below, or watch our tutorial at right.

First, connect to the To access the Customer Dashboard you need to apply for an account. Follow these steps to create an account:

1. Click Create an account

2. Provide the following identification information:

  • Full name

  • Email

  • Password

  • Phone number

  • Click Next

3. Enter information about your company.

  • Click Nex

4. Enter information about yourself.

  • Click Register

5. An account creation message is displayed.

  • Click Ok

6. When you receive an account activation email, it provides you with a link to complete the verification of the account.

  • Click the link provided in the email.

7. An account activation confirmation window is displayed.

  • Click Login

To Log into the Customer Dashboard, proceed as follows:

1. Enter your email and password.

  • Remember that this is the same email and password you used when your account was first created.

  • Click Log In

The Customer Dashboard is displayed

The Customer Dashboard presents groups your product information into categories under a series of information tabs at the top of the dashboard. This categorization enables you to quickly access the information views you need. The information tabs are:

  • SBC: Manage your SBC software licenses.

  • Tmedia: Manage your Tmedia software licenses.

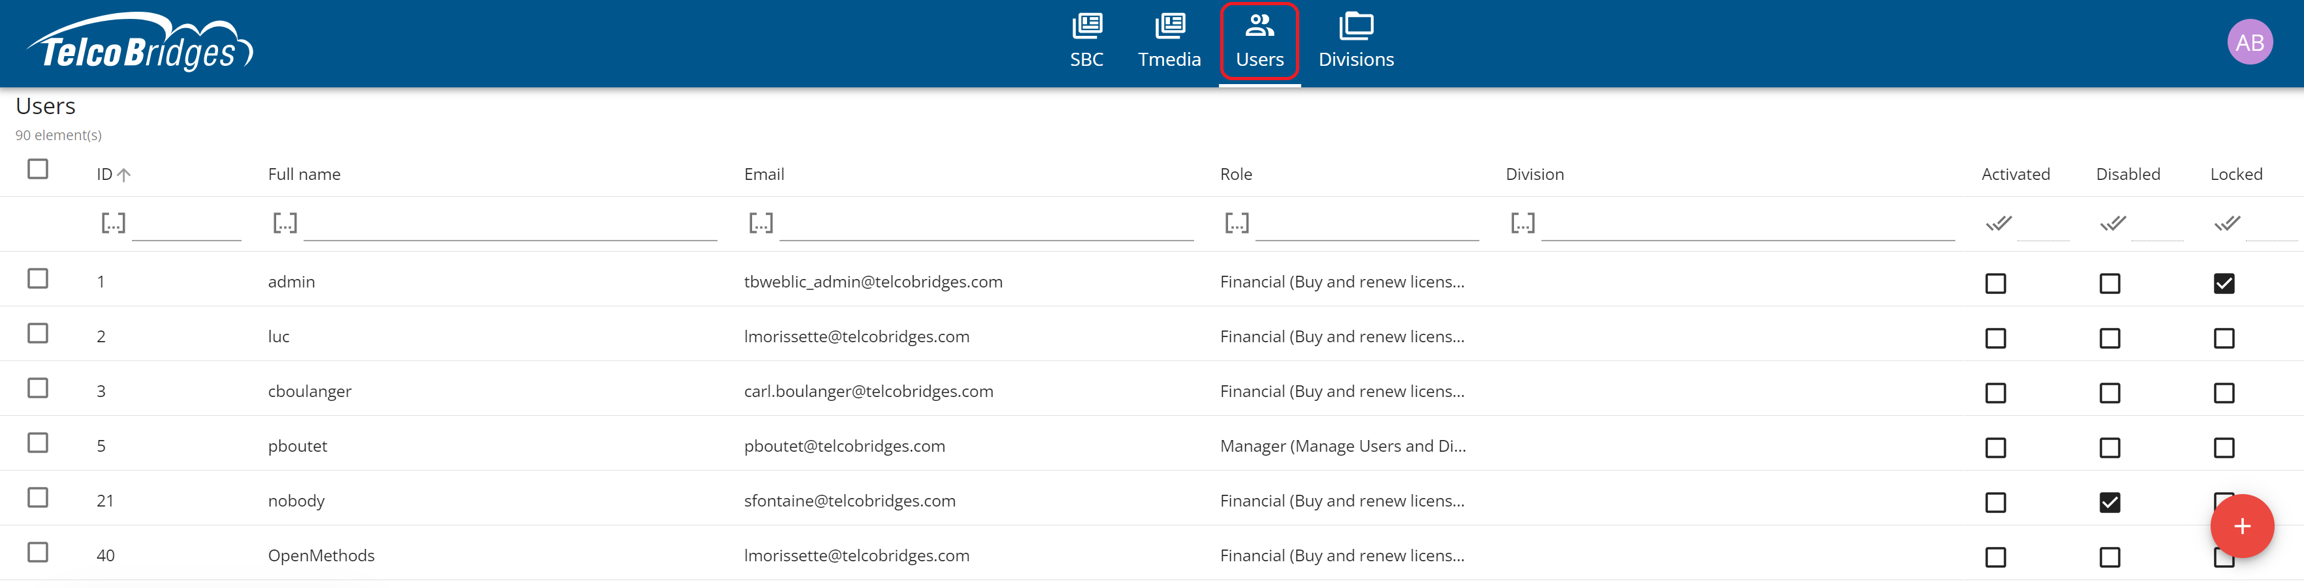
  • Users: Add other users to the dashboard. These users will administer product licenses too.

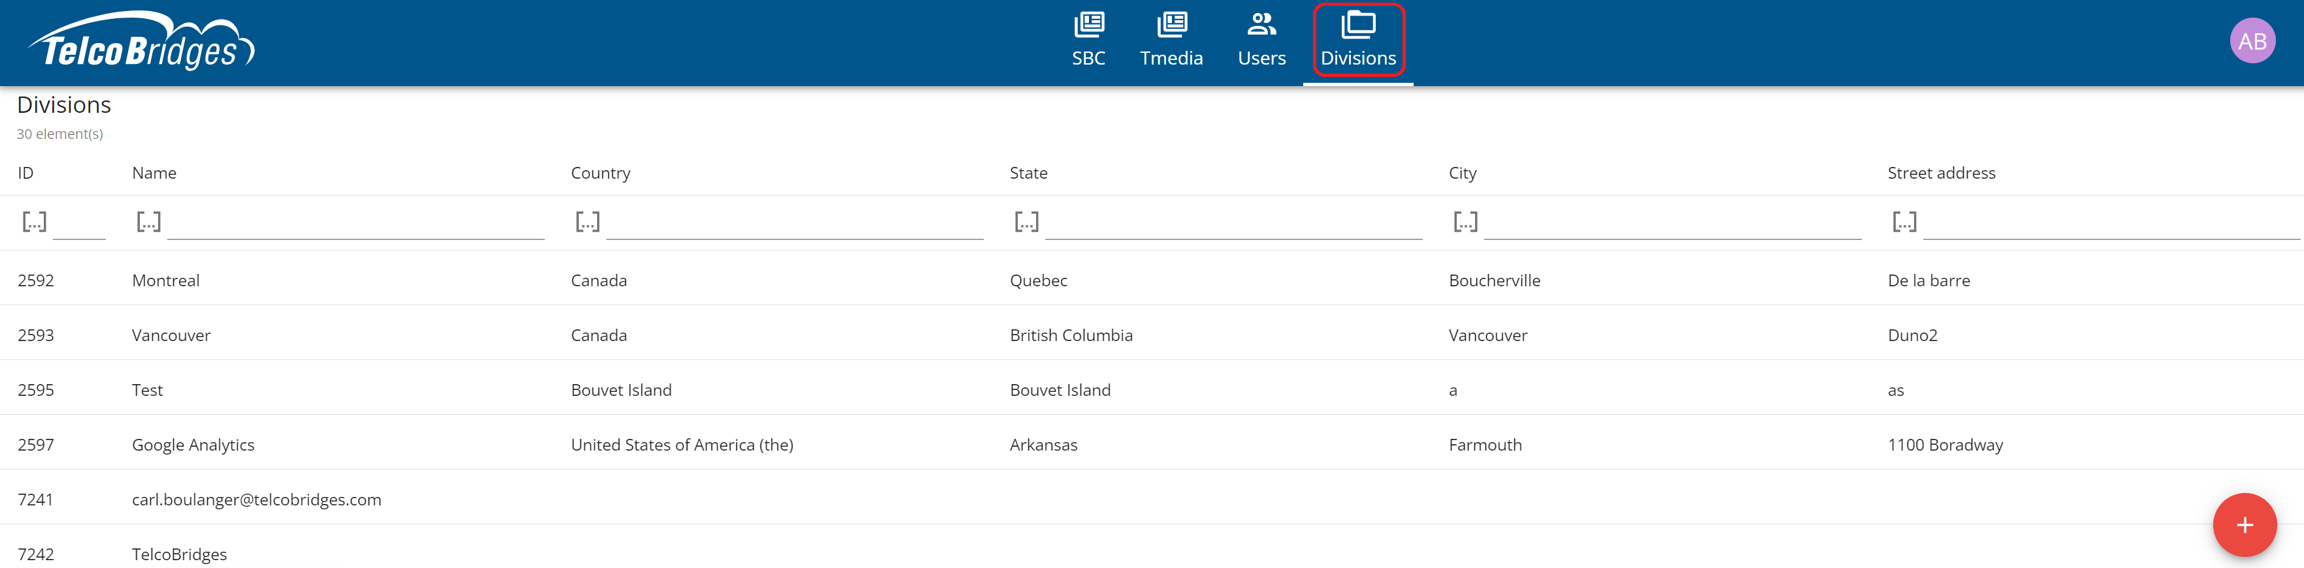
  • Divisions: Used to limit access to specific devices and licenses for a user. Each user can have access to a specific Division, or everything related to the customer. Create divisions for your organization.

In any one of these information views, you can change the sort order of a column by clicking the column header.

You can also filter any view by clicking the filter option ... on any header. By default it is set to includes and entering a filter criteria includes only those matching rows. You can also change the filter options.

SBC Information Tab

Tmedia Information Tab

Users Information Tab

Divisions User Tab

Licenses and support are managed from the Customer Dashboard. Just accessing the SBC information tab enables you to view the status of your product licenses and support options. From this view, you can purchase new license and support. As licenses come up for renewal, you can easily renew them from the same information window. You can also upgrade existing FreeSBC Licenses to ProSBC licenses, thereby enabling you to increase the number of sessions for your SBC product and opting in for support. Once you obtain a license, you upload it to your system.

New Orders
Renewals
Upgrades
Uploading Licenses
Order Support
Activate Spare Device

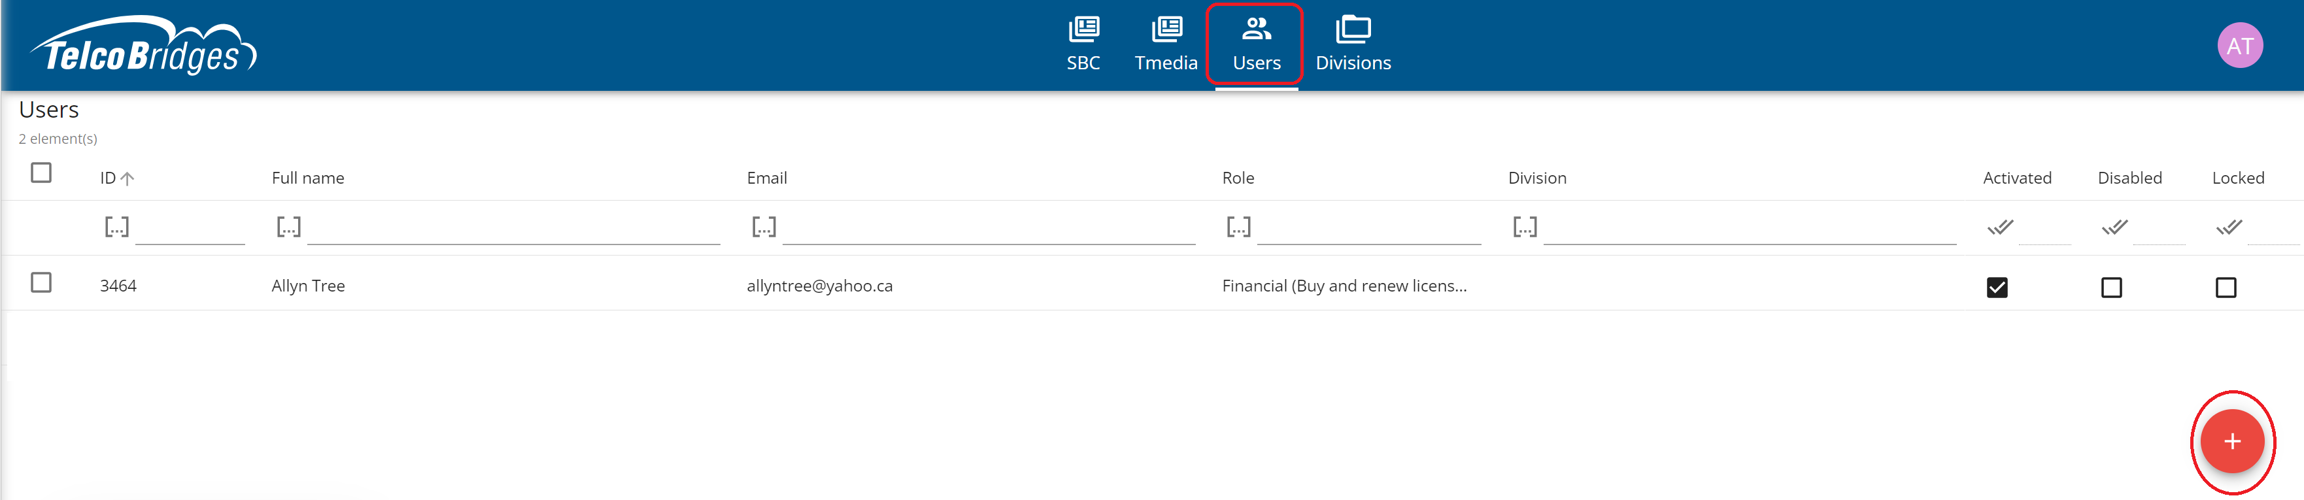
Users can be added to the Customer Dashboard by sending them an invitation. To add a user:

1. Click the Users tab.

2. Click the plus sign +.

3. Fill in the following fields:

  • Name: The location in which the FreeSBC is being used

  • Email

  • Roles: Select from a list of choices

  • Division: Assign the user to a division, if applicable.

2. Click the check mark.

The new user is displayed in the Users information table.

Note: The user is not yet activated and will need to follow the instructions sent in the invitation email.

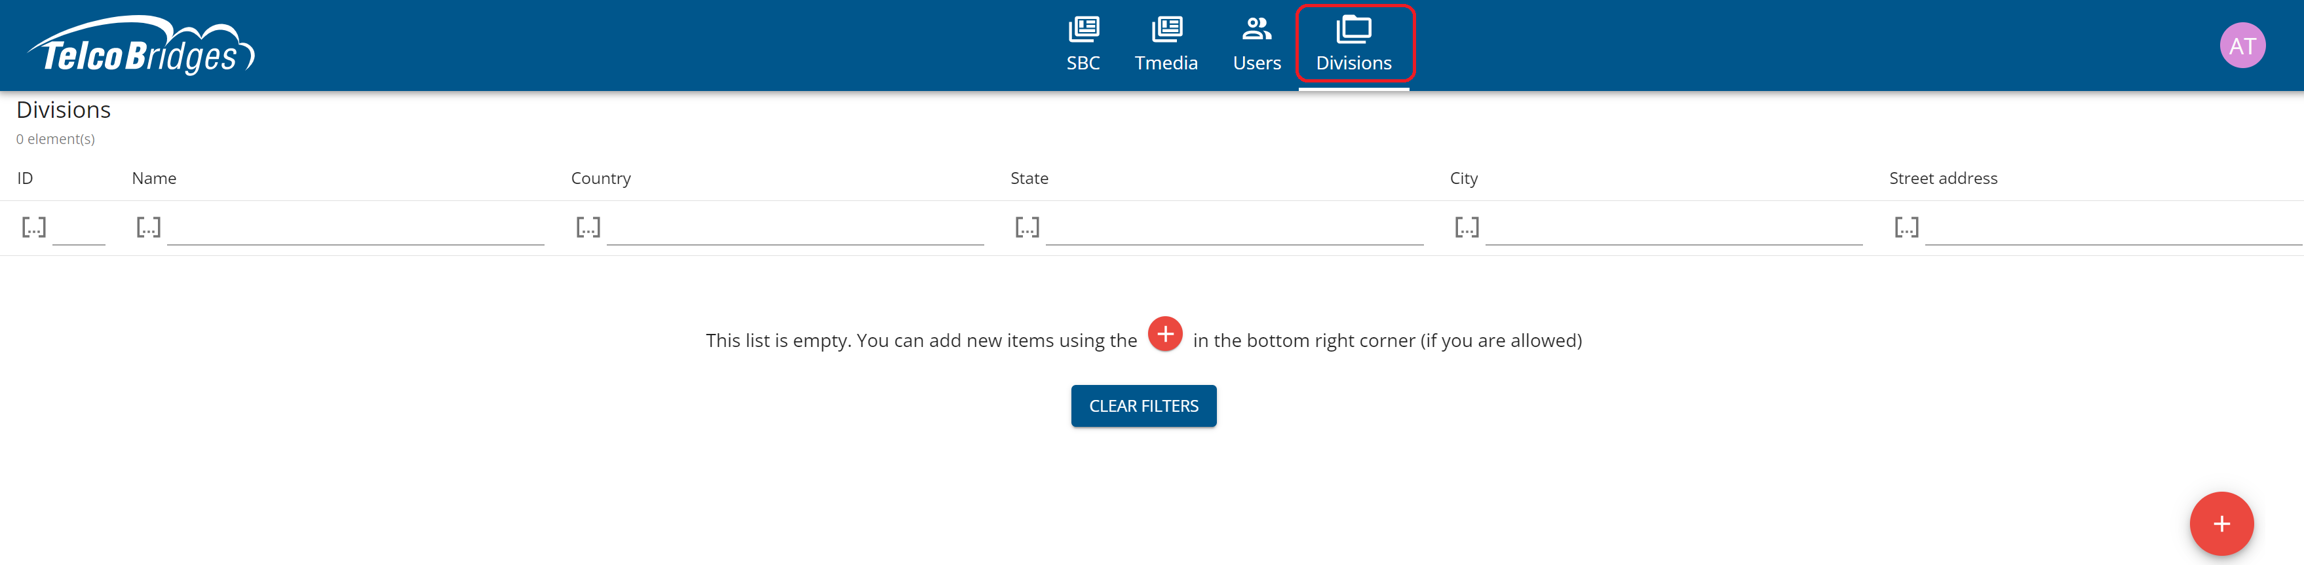
Divisions can be added to the Customer Dashboard. To add a division:

1. Click the Divisions tab.

2. Click the plus sign +.

3. Fill in the following fields:

  • Name: The name of the division

  • Territory

  • Country

  • State/Province

  • Street Address

  • City

  • Zip Code/Postal Code

2. Click the check mark.

The new division is displayed in the Divisions information table.

Note: A user can be added to a division. Just go to the Users tab, select the user and add the divisions.

Order FreeSBC License
Order ProSBC License
Renewing a FreeSBC/ProSBC License
Upgrading a FreeSBC License
Uploading a License
Order Tmedia Support
Activating a Spare Device
Customer Dashboard