
SIP Trunk Configuration Instruction with VoIP.ms SIP trunking
Introduction
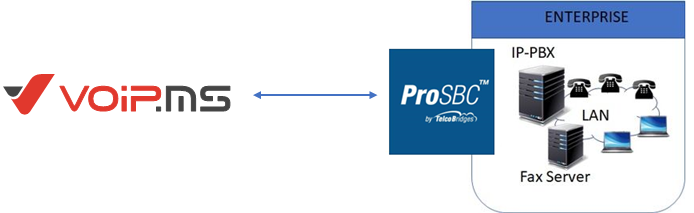
VoIP.ms SIP Trunk Example
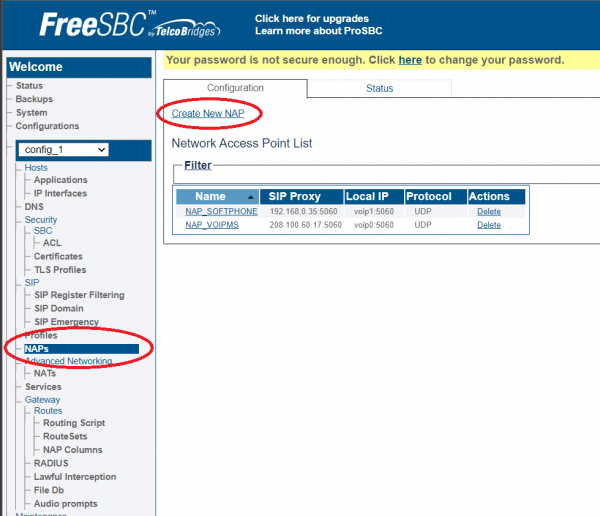
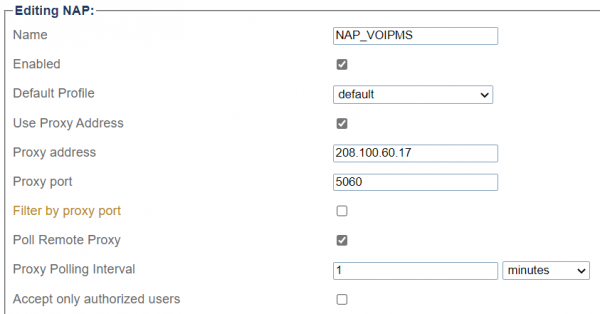
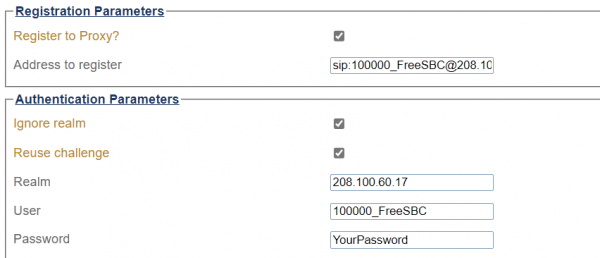
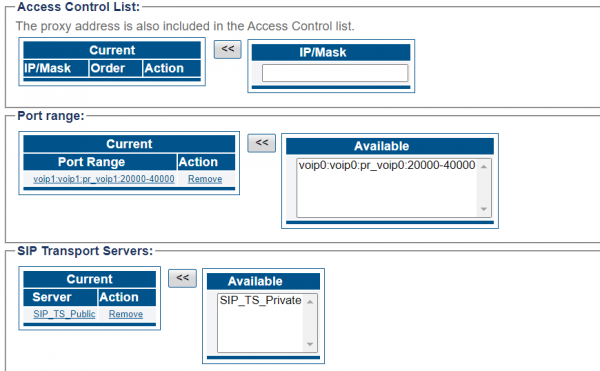
NAP Configuration for VoIP.ms Trunking
Route Configuration for VoIP.ms Trunking
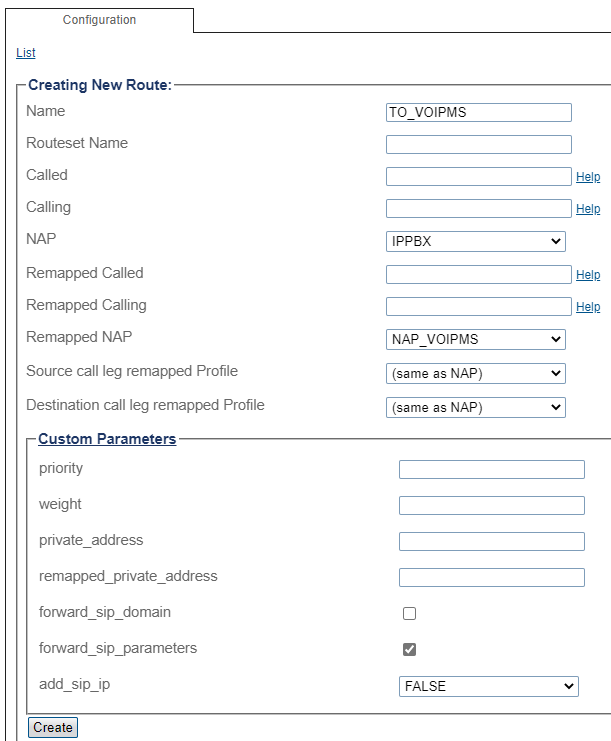
Route for outgoing to VoIP.ms
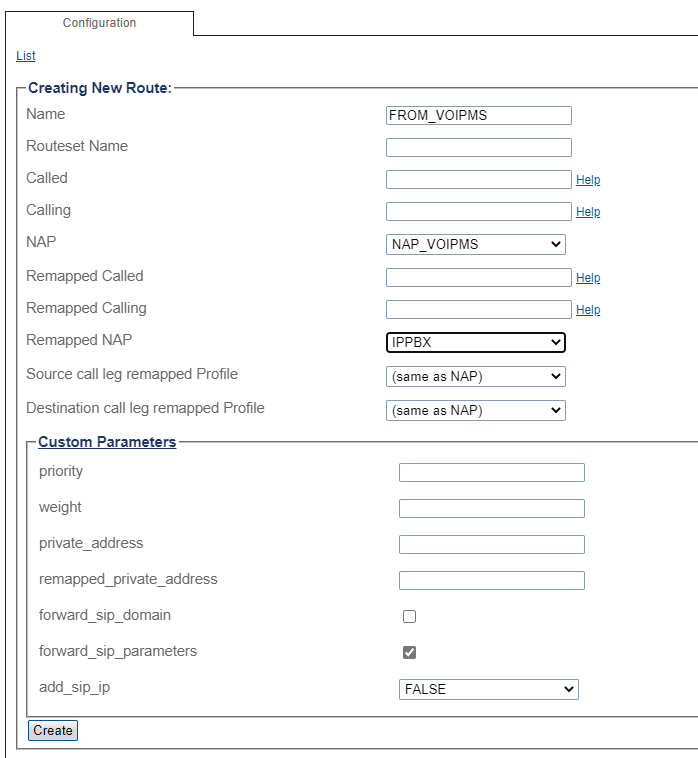
Route for incoming from VoIP.ms
List of Parameters
PreviousSIP Trunk Configuration Instruction with Cisco UCMNextSIP Trunk Configuration Instruction with Wildix Cloud VoIP PBX
Last updated
Was this helpful?